
You put a new bearing on the shaft. Then the machine runs hot and fails in one week.
That happens when you skip checking the radial play before installation.
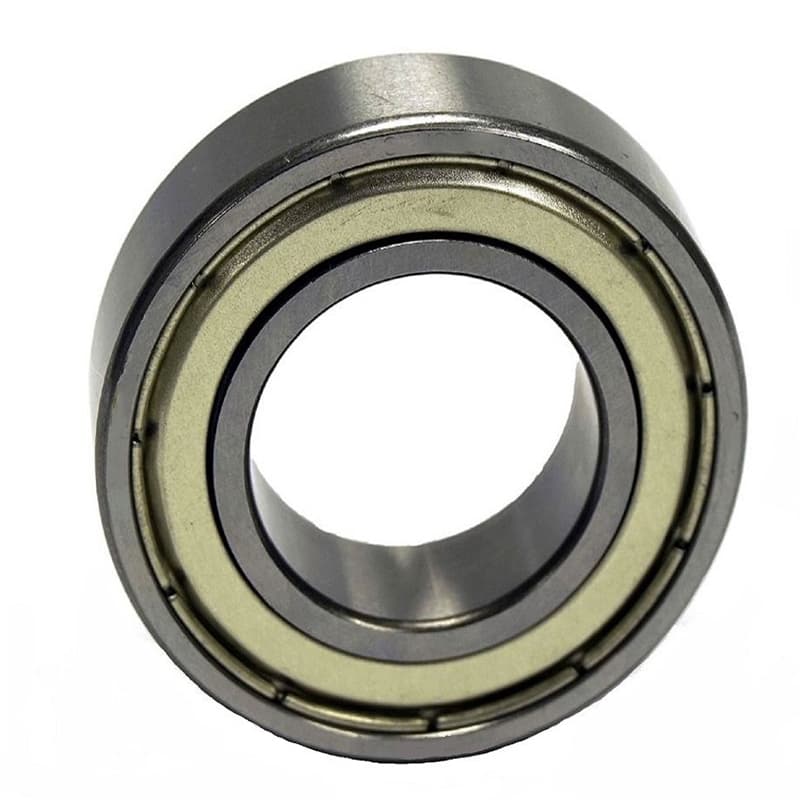
Radial play is the internal clearance between the balls and raceways. You measure it with a dial gauge or feeler gauge. A wrong clearance causes overheating, noise, or early failure.
I run a bearing factory in China called FYTZ Bearing. Many of my customers – like Rajesh from India – ask me why their bearings fail so fast. Most of the time, the problem is simple: they never checked the radial play before mounting. In this article, I will show you why it matters, what tools to use, how to measure step by step, and what numbers you should look for.
Why Is Radial Play Critical for Your Bearing’s Performance and Lifespan?
You install a bearing and it feels tight. You think that is good. But after a few hours, it screams and locks up.
That tight feeling actually tells you the radial play is too small for the working temperature. https://www.bearingworks.com/technical-data/internal-clearance.php
Radial play decides how much heat your bearing can handle. https://www.machinerylubrication.com/Read/28817/prevent-bearings-overheating Too little play makes the bearing pinch and overheat. https://www.nsk.com/content/dam/nsk/am/en_us/documents/bearings-americas/TI%20Internal%20Clearance.pdf Too much play creates vibration and noise. https://dxppacific.com/what-effects-does-internal-clearance-have-on-bearing-life/ The right play gives you long life and smooth running. https://www.spark-bearing.com/article/Handling-Method-of-Bearing-Overheating.html
The Actual Role of Radial Play in a Working Bearing
Many people think a bearing should have zero movement inside. That is wrong. A deep groove ball bearing needs a tiny gap. Why? Because when the bearing runs, it heats up. The inner ring sits on a hot shaft. It expands faster than the outer ring. That expansion eats up the gap. If you start with zero gap, the bearing becomes negative after heating. Then the balls jam between the raceways. Friction jumps up. Heat goes even higher. Then the bearing seizes or spalls.
On the other side, if you start with too much play, the balls bounce around. That creates noise, vibration, and uneven load distribution. A ball might hit the cage too hard. The cage breaks. Then the bearing fails quickly.
So radial play is like a safety zone. It gives room for heat expansion. It also lets the bearing run smoothly under different loads.
My Own Factory Experience with Radial Play
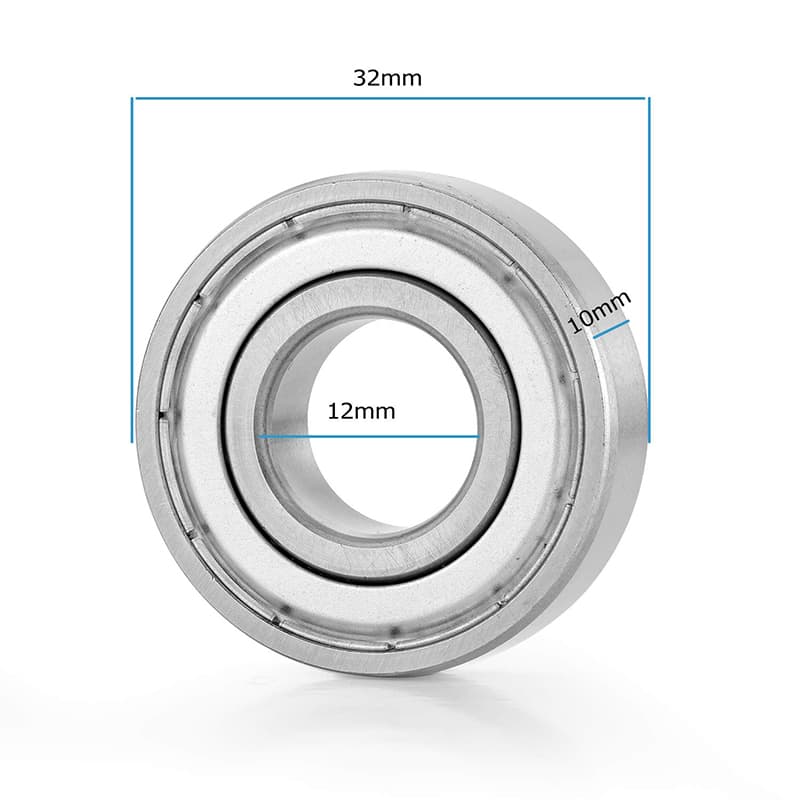
I remember a buyer from Indonesia. He bought 6204 bearings for a small water pump. https://www.rhia.de/datasheet/en/6204-2rs-c3 He did not check the play. After assembly, the pumps ran fine for ten minutes. Then they got hot and stopped. He shipped the pumps back to his customer. The customer was very angry. The buyer called me and said: “Your bearings are bad.”
I asked him: “Did you measure the radial play before installing?” He said no. So I asked him to measure the remaining bearings. All of them had CN (normal) clearance. https://vibromera.eu/glossary/bearing-clearance/ That is not enough for a pump that runs at 80°C. https://bearingsdirect.com/bearing-clearance-data/ I told him to use C3 clearance instead. https://m.demy-bearings.com/news/bearing-clearance-explained-c3-vs-cn-vs-c4-and-how-to-select He ordered a small batch of C3 bearings. https://eurobearing.eu/product/6204-zz-c3-bearing-20x47x14-timken/ He measured them first. The play was correct. He installed them. The pumps ran all day without overheating. rhia
After that, I added a rule in our factory: every buyer who orders bearings for hot or fast applications gets a reminder email. The email says: “Please check your radial play before assembly. Use C3 for pumps and motors.” That simple step saved many of my customers from big losses.
How Radial Play Affects Different Applications
| Application | Operating temp | Recommended play | Why |
|---|---|---|---|
| Small fan in AC unit | 30–50°C | CN | Low heat, low speed tflbearing |
| Water pump | 60–90°C | C3 | Heat expansion needs more room tflbearing |
| Electric motor for compressor | 70–100°C | C3 or C4 | High speed + high heat tflbearing |
| Low-noise pump for hospital | 40–60°C | CN with P5 precision | Quiet but not too hot tflbearing |
| Oven conveyor | 120°C+ | C4 |
So before you install any bearing, ask yourself: “How hot will the bearing get?” Then pick the radial play accordingly.
Which Tools Give You the Most Accurate Radial Play Measurement?
You try to feel the play with your fingers. You think it feels loose or tight. But your fingers lie.
You need the right tool to get a real number. https://www.bearingboys.co.uk/Dial-Indicators-5913-c
The most accurate tools are a dial gauge with a magnetic stand, or a feeler gauge for large bearings. https://www.skf.com/us/products/maintenance-products/hydraulic-tools-for-mounting-and-dismounting/accessories/feeler-gauges For quick checks in the workshop, a go/no-go gauge or a simple shim works. https://pbclinear.com/blogs/blog/guide-for-approved-bearing-inspection-methods But for precision, always use a dial gauge. https://www.timken.com/resources/timken-bearing-adjustment-dial-indicator/
Tool 1 – Dial Gauge (Most Accurate)
A dial gauge measures movement in thousandths of a millimeter. You need a magnetic stand to hold it. You also need a small weight or a lever to apply a light load to the bearing. The standard method (ISO 5753) uses a fixed radial load. The gauge measures how much the bearing moves from one side to the other. This tool gives you a precise number. You can then compare that number to the ISO or ABMA standard tables.
I use dial gauges in my factory on our inspection line. Every batch of bearings gets checked. We record the radial play for each bearing. That ensures our C3 bearings are actually C3, not CN. If you are a distributor or a equipment maker, I strongly recommend buying a good dial gauge. A cheap one from a hardware store may not be accurate. Look for a mitutoyo or a good Chinese brand with 0.01mm accuracy.
Tool 2 – Feeler Gauge (For Larger Bearings)
A feeler gauge is a set of thin metal blades. You slide them between the balls and the raceway. This works for bigger bearings – usually above 70mm bore. For small deep groove ball bearings (like 6200 series), a feeler gauge is hard to use because the gap is too small. But for a 6308 or bigger, you can use a 0.03mm or 0.05mm blade. This method is not as accurate as a dial gauge. But it is quick and good for a simple pass/fail check.
Tool 3 – Go/No-Go Gauge (Quick Workshop Check)
This is a simple tool that bearing factories use. It has two ends: one that should go into the gap (go) and one that should not (no-go). https://www.mscdirect.co.uk/spi-m2-x-04-metric-coarse-gonogo-double-ended-6h-screw-plug-gauge-spu-34613j For example, for a C3 bearing with a radial play range of 13–23 microns, a go gauge might be 12 microns (should go in) and a no-go gauge 24 microns (should not go in). https://bearingsdirect.com/bearing-clearance-data/ If the 12 micron gauge does not go in, the play
Tool 4 – Your Hand? No – Do Not Do That
I have seen mechanics hold the bearing between their fingers and shake it. They say: “Feels fine.” I also saw that same mechanic have a bearing fail two days later. Your hand cannot feel 10 microns of difference. So please do not guess. Use a real tool. A good dial gauge costs maybe $50. That is much cheaper than replacing a failed machine or losing a customer.
My Advice to Distributors Like Rajesh
Rajesh from India often buys bulk bearings from me. He resells them to repair shops. I told him: “Rajesh, give your top ten customers a cheap dial gauge and a one-page instruction sheet.” He did that. His customers started checking radial play before installation. Their repair failures dropped. Now they trust Rajesh more and buy bigger orders. So investing in a measuring tool pays back very fast.
How Do You Check Radial Play Step by Step Using a Dial Gauge?
You have a bearing in your hand. You have a new dial gauge. But you do not know where to start.
It looks complicated. But the process is just five easy steps.
Step 1 – Clean the bearing. Step 2 – Mount the bearing on a flat surface. Step 3 – Set up the dial gauge. Step 4 – Apply a light load. Step 5 – Rotate and read the gauge. The radial play is the difference between the highest and lowest reading.
Step 1 – Clean the bearing but do not remove the grease
The bearing comes with rust preventive oil or grease. You do not need to wash it off. Just wipe the outer surface with a clean cloth. Make sure there is no dust or metal chips on the raceways. If the bearing has thick shipping grease, that can affect the measurement. In that case, you can degrease the bearing with solvent, measure it, then re-grease. But for most sealed bearings (2RS), you measure them as they are.
Step 2 – Prepare the bearing on a fixture
Place the bearing on a clean flat metal plate or a V-block. The outer ring should sit firmly. The inner ring should be free to move. Some people measure radial play with the outer ring clamped and the inner ring loaded. Others measure with the bearing lying on its side. The standard ISO method (ISO 5753-1) uses a shaft through the inner ring with a radial load applied. For small bearings, you can hold the outer ring still and push the inner ring sideways.
Step 3 – Set up the dial gauge
Mount the dial gauge on a magnetic stand. Put the gauge tip against the outer ring or the inner ring – depending on your method. The easiest way: set the bearing on a table. Clamp the outer ring down. Place the dial gauge tip touching the inner ring. Then push the inner ring from the opposite side. The gauge will show the movement. Zero the gauge when the inner ring is in the neutral position.
Step 4 – Apply a consistent light load
You need a small force to push the inner ring to one side. Use a spring or a small weight. The standard is usually 5 to 10 Newtons (about 0.5 to 1 kg). Do not use your finger because your force changes. Put a dead weight on a lever or use a spring scale. Push the inner ring in one direction. Read the gauge. Then push it in the opposite direction. Read the gauge again. The radial play equals the total movement from one extreme to the other.
Step 5 – Rotate and take multiple readings
Bearings are not perfectly round. So take readings at three or four different positions. Rotate the inner ring by 90 degrees each time. Write down the numbers. Then average them, or take the largest value as the maximum radial play. Compare that number to the standard clearance table (which I will give in the next section).
A Real Example from My Factory
In our quality control room, we check every bearing batch. Last week, we ran a batch of 6205 C3 bearings. The target radial play for a 6205 C3 is between 13 and 23 microns (0.013–0.023 mm). We cleaned the bearings. We mounted a shaft through the inner ring. We put a 1 kg weight on one side. Then we placed the dial gauge on the opposite side. The gauge showed a movement of 0.018 mm. That is inside the range. So the batch passed. If it showed 0.011 mm, we would reject it because it is too tight. That bearing would overheat.
I made a simple video of this process for my customers. If you want it, just email me at sales@fytzbearing.com.
What Are the Standard Radial Play Ranges for Common Bearing Sizes?
You measure a bearing and get a number. But what does that number mean? Is it good or bad?
You need a reference table. https://tflbearing.com/blog/understanding-the-importance-of-bearing-clearance.html I will give you the standard ISO radial play ranges for the most common deep groove ball bearing sizes. https://medias.schaeffler.be/en/knowledge-center/rolling-bearings/bearing-data
Radial play is grouped into classes: CN (normal), C2 (smaller), C3 (larger), C4 (very large).
The ISO 5753-1 Radial Play Table (for bearings with bore diameter from 10 to 50 mm)
Here are the clearance ranges in microns (1 micron = 0.001 mm). These numbers are for unmounted bearings measured with a light load.
| Bearing bore (mm) | C2 (min–max) | CN (min–max) | C3 (min–max) | C4 (min–max) |
|---|---|---|---|---|
| 10 – 18 | 0–7 | 3–11 | 8–16 | 14–22 |
| 18 – 24 | 0–8 | 5–13 | 10–18 | 18–26 |
| 24 – 30 | 1–9 | 6–14 | 12–20 | 20–28 |
| 30 – 40 | 2–10 | 8–16 | 15–23 | 24–32 |
| 40 – 50 | 3–11 | 10–18 | 18–26 | 28–36 |
How to Use This Table
First, measure your bearing’s bore. Let us say you have a 6204 bearing. Its bore is 20 mm. Look at the row “18 – 24”. If the bearing has CN (normal) clearance, the radial play should be between 5 and 13 microns. If it has C3, it should be between 10 and 18 microns. If your measurement shows 9 microns, that is still inside CN but not inside C3. So if you ordered C3 but got 9 microns, you actually got a CN bearing. That is a problem.
Common Mistakes with These Ranges
- Do not measure a bearing that is already installed. These numbers are for unmounted bearings only. Once you press it onto a shaft, the inner ring expands and the play changes.
- Do not compare different brands without measuring. Some cheap factories mark CN but actually have C2 or C3. I have seen this many times. That is why I always tell my customers: “Measure before you trust the label.”
- For pump applications, if the working temperature is above 70°C, choose C3. For 100°C or more, choose C4.
A Story from a Customer in Egypt
A pump manufacturer in Egypt ordered 10,000 bearings from me. He wanted C3 clearance for his hot water pumps. Before shipping, I sent him a measurement report from my inspection line. But he also measured a sample himself. He found that some bearings had 14 microns (good for C3) and some had 9 microns (bad). I checked my records. A worker had mixed CN bearings into the C3 box by mistake. I replaced the whole batch and added a free extra 100 bearings. The customer trusted me more after that. Now he always measures first. And I changed my packing process to double-check the clearance stamp.
Conclusion
Checking radial play before installation takes five minutes but saves weeks of failure. Use a dial gauge, know your clearance class, and never guess.