
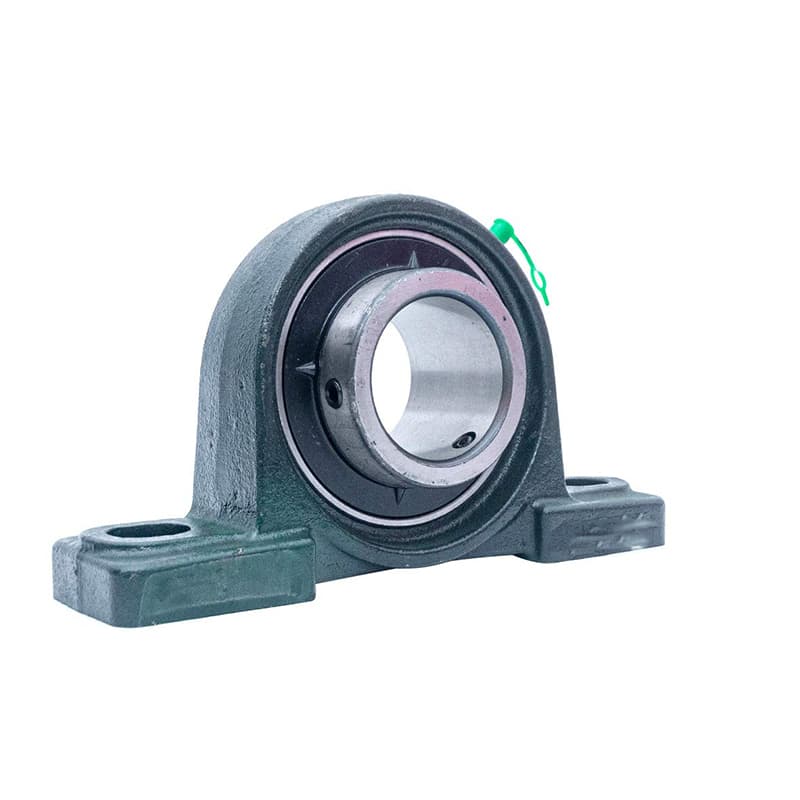
You put a new bearing outside. Three months later, it is already dead. Why?
Outdoor pillow block bearings fail early because of water, dust, heat, and poor mounting. Pick the right seal, housing, and grease. Then install it the right way. That is how you make them last.
I have seen this problem too many times. A customer in Indonesia called me last month. His conveyor bearings fail every six weeks. He is tired of replacing them. So let me walk you through what kills outdoor bearings. I will also show you how to stop it.
What Outdoor Conditions Actually Kill Your Pillow Block Bearings?
You think all outdoor conditions are the same. But rain hurts your bearing differently than sun. So which one is the real killer?
The top outdoor killers are standing water, fine dust, temperature swings, and UV light. Each one damages the bearing in a different way. Water causes rust. Dust eats the seals. Heat kills the grease.
Dive deeper Paragraph:
I remember a customer in Russia. He makes farm equipment. He sells it to farmers in wet, muddy areas. His bearings kept failing after one season. He thought all outdoor bearings were the same. They are not.
Let me break down each outdoor condition. You need to know what you are fighting.
Water and rain
Water is the most obvious killer. But it is not just rain. It is also morning dew, snow, and pressure washing.
Water does three bad things to a bearing:
| Water problem | What happens | How fast it kills |
|---|---|---|
| Rust on balls and races | Bearing surfaces get rough | 2 to 4 weeks |
| Washed out grease | No lubrication left | A few days |
| Water in grease | Grease turns into milky sludge | 1 to 2 weeks |
I tested this in our factory. We put two bearings outside. One with good seals. One with bad seals. The bad seal bearing rusted in 10 days. The good one lasted six months.
Dust and fine particles
Outdoor dust is different from indoor dust. Outside, you get sand, soil, pollen, and road dust. Some of these particles are very small. They fit through tiny gaps in a cheap seal.
Once the dust gets inside, it works like sandpaper. The balls and raceways wear down fast. Then the bearing gets loose. Then it fails.
Temperature swings
Outdoor temperatures change from day to night. In some countries, it can be 40°C during the day and 15°C at night.
These changes make the bearing housing expand and shrink. The shaft does too. If the housing and shaft are made of different metals, they expand at different rates. That changes the internal clearance. Too much clearance makes the bearing loose. Too little clearance makes it tight and hot.
UV light from the sun
Most people do not think about sunlight. But UV light destroys rubber seals. The rubber cracks and hardens. Once the seal cracks, dust and water get in easily.
I saw this in Egypt. A customer used standard bearings on outdoor conveyors. The seals cracked after three months of strong sun. He switched to UV-resistant seals. The bearings lasted over a year.
My simple advice for outdoor conditions
Ask yourself three questions before you pick a bearing:
- Does water pool near this bearing?
- Is there fine dust or sand in the air?
- Does the temperature change a lot from day to night?
If you answer yes to any of these, you need a higher grade bearing. Do not use standard indoor parts outside. It will cost you more in the long run.
Why Water and Dust Are Your Bearings’ Worst Enemies?
You have a bearing with a seal. So water and dust should stay out, right? Then why do they still get inside?
Because most standard seals are not made for real outdoor work. Water pushes past a weak seal. Dust works its way in over time. Once inside, they stay inside and destroy the bearing from within.
Dive deeper Paragraph:
I get this question all the time. A customer sends me a photo. The bearing looks fine from the outside. But inside, it is full of mud and rust. He asks me, "How did that get in there?"
Let me show you how water and dust attack your bearing.
How water gets past a seal
Water is tricky. It does not need a big hole. It can crawl through a tiny gap using surface tension.
Think of how water climbs up a thin tube. That is the same idea. Water finds a small gap between the seal lip and the shaft. Then it pulls itself inside. Once one drop gets in, more follow.
Here are the ways water enters a bearing:
| Entry point | Why it fails | How to stop it |
|---|---|---|
| Seal lip gap (https://www.skf.com/group/products/seals/principles-of-sealing) | Water pulls itself in (https://www.machinerylubrication.com/Read/301/water-contamination-oil) | Use a contact seal with more pressure (https://www.ntn-snr.com/support/technical-resources) |
| Grease fitting (https://www.mcmaster.com/grease-fittings/) | Water goes through the fitting | Use a capped grease fitting (https://www.machinerylubrication.com/Read/288/grease-contamination) |
| Housing split line (https://www.skf.com/group/products/rolling-bearings/housings) | Water seeps between housing halves | Use a gasket or sealant (https://www.loctiteproducts.com/en/products/build/sealants.html) |
| Shaft surface (https://www.timken.com/resources/engineering-manual/) | Rough shaft tears the seal | Keep the shaft smooth (Ra < 0.8 µm) (https://www.engineeringtoolbox.com/surface-roughness-d_799.html) |
How dust gets past a seal
Dust is different from water. Dust does not crawl. It gets pushed in by the shaft movement.
Every time the shaft turns, it creates a small vacuum. That vacuum pulls air in and out of the bearing. Dust rides on that air. Over time, the dust builds up behind the seal.
I did a test with two identical bearings. One ran in clean air. One ran in dusty air. The dusty bearing failed in one third of the time.
The combination is worse than each one alone
Here is the real problem. Water and dust together are deadly. (https://www.machinerylubrication.com/Read/301/water-contamination-oil)
Dust alone dries out the grease. (https://www.machinerylubrication.com/Read/288/grease-contamination) Water alone causes rust. (https://www.corrosionpedia.com/definition/1130/rust) But water plus dust creates mud. Mud is worse than either one. It blocks the seal completely. It also grinds the bearing surfaces like sandpaper. (https://www.skf.com/group/products/seals/principles-of-sealing)
I remember a customer in Vietnam. His conveyor bearings were near a rice paddy. They got splashed with water and fine dust. The bearings turned into mud-filled shells in two months. He switched to bearings with labyrinth seals (https://www.skf.com/group/products/seals/industrial-seals/labyrinth-seals) and added rubber covers. His bearing life went up to 14 months. (https://www.ntn-snr.com/support/technical-resources)
What you can do right now
Stop using standard bearings in wet, dusty places. Upgrade to these features:
- Triple lip or labyrinth seals for dust protection
- Contact seals for water protection
- Stainless steel for wet areas
- Regular regreasing to push out old dirty grease
One more tip. Add a simple rubber boot or cover over the bearing. It costs very little. But it stops 80% of water and dust before they even reach the seal.
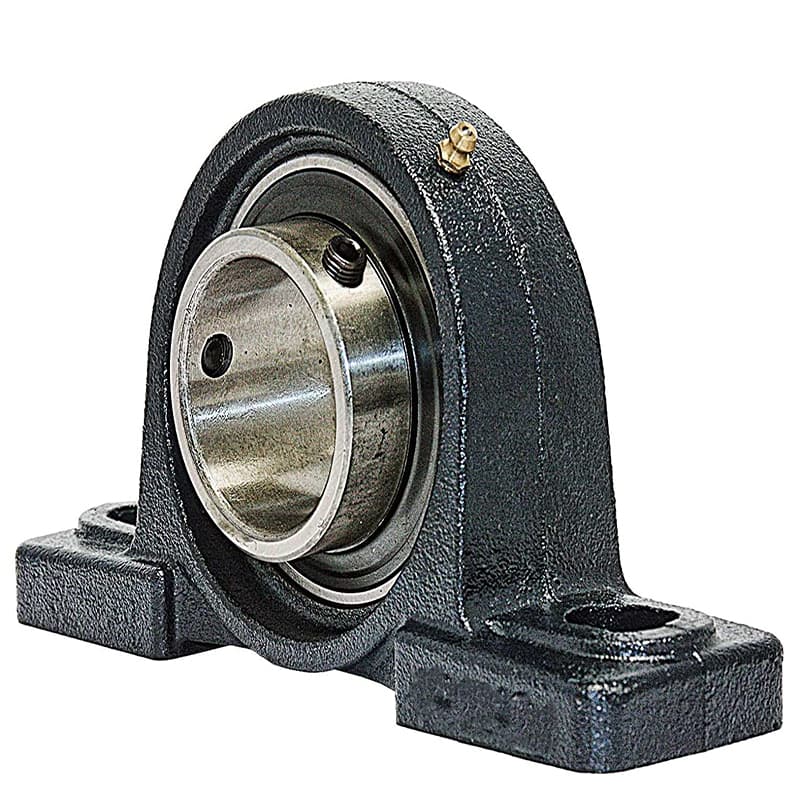
The Right Seal Makes or Breaks Outdoor Bearing Life?
You look at two bearings. They look the same. But one lasts one year. The other lasts one month. What is the difference? The seal.
A good seal keeps dirt and water out. A bad seal lets everything in. For outdoor use, choose a triple lip seal or a labyrinth seal. Single lip seals are only for clean, dry places.
Dive deeper Paragraph:
I talk to buyers every week. Many of them do not know there are different seals. They think all pillow block bearings have the same rubber ring. That is not true.
Let me explain each seal type. I will tell you when to use each one.
Single lip seal
This is the most basic seal. It has one rubber lip that touches the shaft.
Good for: Clean indoor conveyors, light dust only
Bad for: Any outdoor use, wet areas, heavy dust
I only recommend this for machines inside a clean factory. For outdoor farm or mining work, stay away from this seal.
Double lip seal
This seal has two rubber lips. They both touch the shaft. The second lip adds a little more protection.
Good for: Light outdoor use, covered areas, occasional dust
Bad for: Rain, pressure washing, fine sand
This is okay for a conveyor under a roof. But do not use it in open fields or near water.
Triple lip seal
This is my go-to for most outdoor jobs. Three rubber lips touch the shaft. They also have a small gap that acts like a maze.
Good for: Most outdoor uses, dust, light rain, farm equipment
Bad for: Standing water, high pressure washing
I recommend this to 80% of my outdoor customers. It works well without costing too much.
Labyrinth seal
This seal has no rubber lips. Instead, it has a long twisting path. (https://www.skf.com/group/products/seals/industrial-seals/labyrinth-seals) The shaft and housing have interlocking rings. Dust and water have to go around many corners to get inside. (https://www.ntn-snr.com/support/technical-resources)
Good for: Heavy dust, sand, grain elevators, mining (https://www.machinerylubrication.com/Read/315/labyrinth-seals-applications)
Bad for: High pressure water, very wet conditions (https://www.skf.com/group/products/seals/principles-of-sealing)
Contact seal
This seal presses hard on the shaft. It creates a very tight barrier.
Good for: Wet conditions, rain, washdown areas
Bad for: High speed (it creates heat), heavy dust (dust grinds the rubber)
Quick comparison table
| Seal type | Dust protection | Water protection | Best outdoor use |
|---|---|---|---|
| Single lip | Poor | Poor | None outdoors |
| Double lip | Fair | Poor | Covered outdoor areas |
| Triple lip | Good | Fair | Most farm and conveyor work |
| Labyrinth | Excellent | Fair | Grain elevators, dusty sites |
| Contact seal | Fair | Excellent | Wet areas, washdown |
My seal recommendation by job type
- Farm conveyor in open field: Triple lip seal
- Grain elevator with fine dust: Labyrinth seal
- Wet area near a pond: Contact seal with stainless steel
- Desert or sandy area: Labyrinth seal
- Pressure washing every day: Contact seal with extra grease
One more thing. The shaft surface matters too. A rough shaft tears up any seal. Keep your shaft smooth. I recommend Ra 0.4 to 0.8 micrometers. If your shaft is rough, no seal will save you.
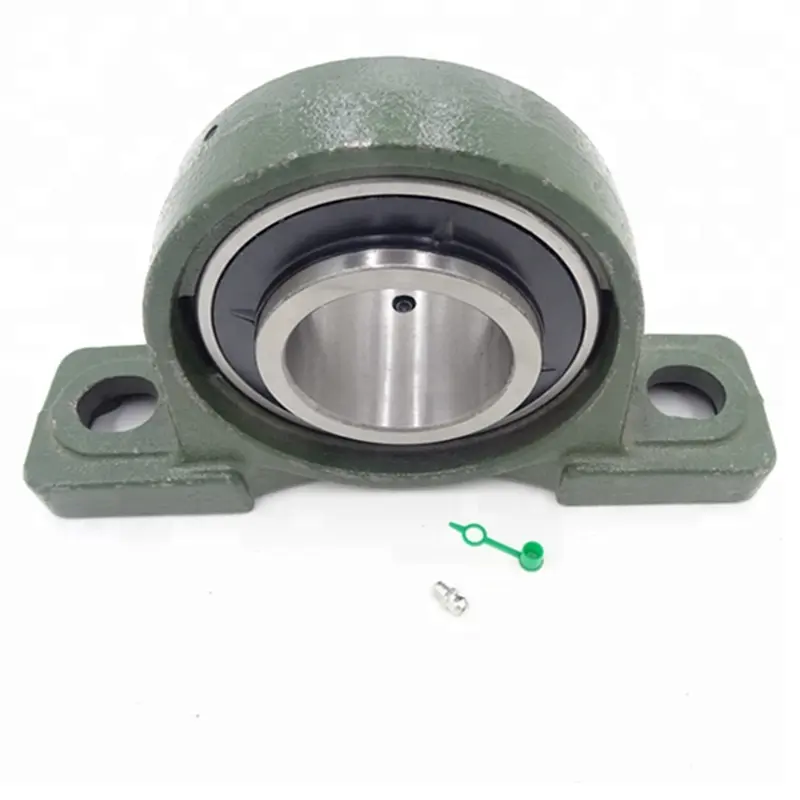
How to Mount and Align Bearings for Rain, Snow, and Heat?
You buy the best bearing. Great seals. Good housing. Then you install it wrong. What happens? It still fails fast.
Proper mounting and alignment double the life of any outdoor bearing. Keep the shaft straight. Lock the bearing tight. Add grease before you start. And check alignment once a month.
Dive deeper Paragraph:
I have seen good bearings die young. The reason was always bad installation. A customer in Brazil sent me photos. His bearings were new. But they were already loose on the shaft. He did not lock them tight enough.
Let me walk you through the right way to mount outdoor bearings.
Step 1: Check the shaft first
Before you put the bearing on, check the shaft. Is it straight? Is it smooth? Is it the right size?
Use a caliper to measure the shaft. It should match the bearing bore size. Too loose and the bearing spins on the shaft. Too tight and you cannot get it on.
Also check for burrs or rust. Sand the shaft smooth if needed. A rough shaft tears seals.
Step 2: Choose your locking method
There are three common ways to lock a bearing to a shaft. Each one works better for different outdoor jobs.
| Locking method | How it works | Best for outdoor |
|---|---|---|
| Set screw | Two screws bite into the shaft | Light loads only |
| Eccentric locking collar | A collar turns and locks | Medium loads, easy to install |
| Adapter sleeve | A split sleeve tightens around the shaft | Heavy loads, vibration, outdoor use |
For outdoor use, I prefer the adapter sleeve. It grips the whole shaft. Set screws can come loose when temperatures change. The adapter sleeve does not.
Step 3: Align the bearing housing
Misalignment is a big killer. When the bearing is not straight with the shaft, the load goes to one edge. That edge gets hot and fails.
Here is how to check alignment:
- Put the bearing on the shaft loosely
- Push the housing against its mounting surface
- Tighten the housing bolts halfway
- Spin the shaft by hand. It should turn easy.
- If it feels tight, move the housing until it spins free
- Tighten all bolts fully
I use a simple laser alignment tool. But you can also use a straight edge or a string line. The key is to take your time. Do not rush this step.
Step 4: Add grease before you start
Many people forget this step. New bearings come with some grease inside. But for outdoor use, I add more grease before I start the machine.
Pump grease into the fitting until you see old grease push out from the seal. That means the bearing is full. The new grease also pushes out any air or moisture.
Step 5: Protect the bearing after mounting
Your job is not done after mounting. Add extra protection for outdoor use.
- Put a rubber cover or shield over the bearing
- Point the grease fitting up, not down
- Add a cap to the grease fitting
- Seal the housing split line with silicone
I remember a customer in Turkey. He mounted all his bearings the right way. But he did not add rubber covers. Rain splashed directly on the seals. Water still got in. He added simple covers made from old conveyor belt. His bearing failures stopped.
A simple monthly check
Outdoor bearings need attention. Once a month, do this quick check:
- Look for rust or water stains
- Listen for grinding or squeaking noises
- Feel the housing. Is it hot?
- Add two pumps of fresh grease
- Check bolts are still tight
This takes five minutes per bearing. It can add years to the bearing life.
Conclusion
Pick good seals for your weather. Mount the bearing straight. Add grease before you start. Check it once a month.