
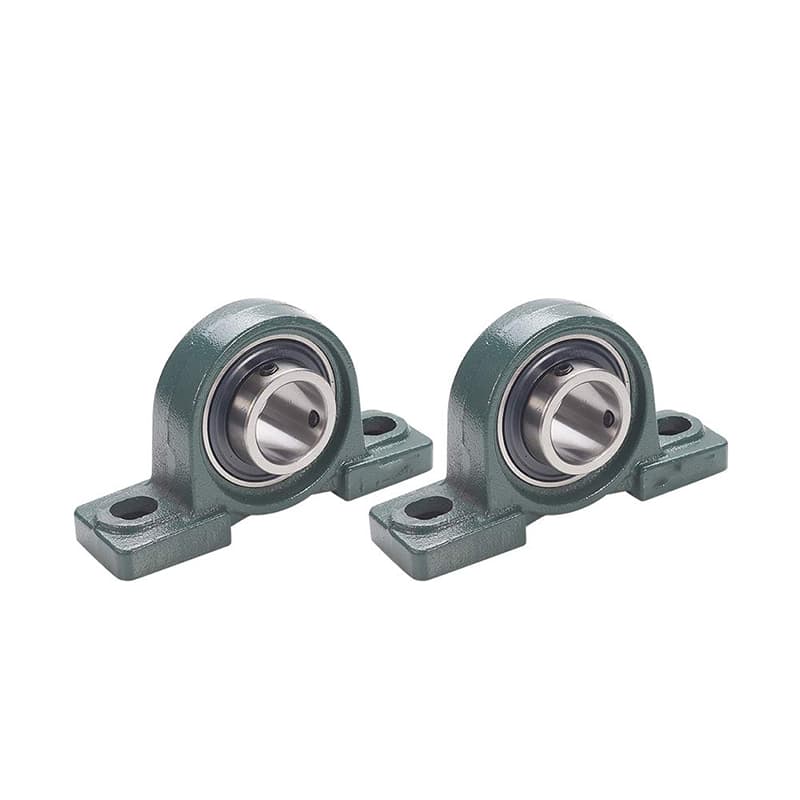
Your container of pillow blocks arrives after a long ocean voyage. You open the boxes and find rust on some housings. The inserts feel rough when you spin them. Now you face a dispute with your supplier, delayed orders, and unhappy customers. A simple pre-shipment inspection could have prevented all of this.
Inspecting pillow block bearings before shipment involves checking the housing for casting defects, dimensional accuracy, bolt hole alignment, and surface finish, and checking the bearing insert for smooth rotation, radial and axial play, seal integrity, and proper lubrication. A systematic inspection ensures only quality products reach your customers.
In my years of running a bearing factory, I have learned that inspection is not just a final step. It is a promise to our clients. For a distributor like Rajesh in India, receiving a bad batch of pillow blocks can damage years of trust with his customers. Let’s walk through a thorough inspection process, from visual checks to dimensional verification, and identify common problems before they become your problems.
How to check pillow block bearings?
You receive a shipment of pillow blocks. You need to verify they are correct and defect-free before sending them to your customers or using them in your machines. A quick spin test is not enough. You need a systematic method.
To check pillow block bearings, follow a multi-step process: 1) Visual inspection1 of housing for cracks, porosity, and finish. 2) Dimensional check2 of bore size, bolt hole spacing, and height. 3) Rotational check3 of the insert for smoothness, noise, and axial/radial play. 4) Seal inspection for damage and proper fit. 5) Lubrication check4 to ensure correct grease amount.
This process ensures the complete unit—both housing and bearing insert—meets specifications. Let’s break it down.
A Comprehensive Pillow Block Inspection Protocol
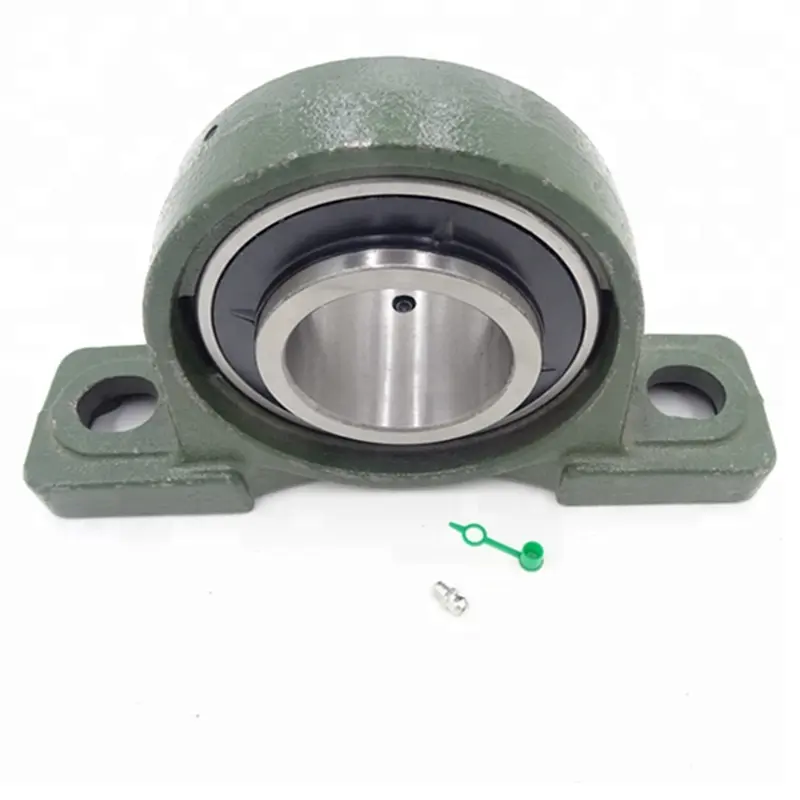
1. Visual Inspection of the Housing:
This is your first line of defense.
- Casting Defects: Look for visible cracks, porosity (small holes from casting), or cold shuts (areas where molten metal didn’t fuse properly). These weaken the housing.
- Surface Finish: The machined surfaces (base, bore) should be smooth. Rough surfaces indicate poor machining.
- Paint/Coating: Check for even coverage, runs, or bare spots. The coating protects against corrosion.
- Identification Markings: Verify the housing size (e.g., UCP 208) is clearly and correctly marked.
2. Dimensional Verification:
Use calipers, a tape measure, and a go/no-go gauge or shaft for this.
- Bore Diameter: This is the most critical dimension. Measure the housing bore that holds the insert. It must be within tolerance. Too tight, and the insert won’t fit. Too loose, and it will spin in the housing.
- Bolt Hole Spacing (Center Distance): Measure from the center of one bolt hole to the center of the other. This must match your machine’s mounting pattern.
- Bolt Hole Size: Ensure the holes are the correct diameter for your bolts.
- Height from Base to Bore Center: This ensures the shaft height will be correct when mounted.
- Shaft Fit Test: A good practical test is to slide the pillow block onto a precision shaft of the correct diameter. It should slide smoothly but have minimal radial play.
3. Bearing Insert Inspection:
This is the heart of the unit. Perform these checks with the insert still in the housing, and if possible, after removing it from the housing (on a sample basis).
- Rotational Smoothness: Rotate the insert by hand. It should spin smoothly and quietly, with no catching, grinding, or rough spots.
- Radial Play: Try to move the inner ring up and down relative to the outer ring. There should be a small, consistent amount of play (internal clearance). Zero play or excessive play are both problems.
- Axial Play: Push and pull the inner ring along the shaft axis. There should be a small amount of axial movement. For most pillow blocks, this is normal.
- Seal Inspection: Look at the rubber seals on both sides. They should be perfectly round, seated flush in the outer ring, and have no cuts, tears, or deformation. Gently lift the seal lip to ensure it’s not stuck to the inner ring.
4. Locking Mechanism Check:
- Set Screws: Ensure they are present and can be tightened. Check the hex socket for damage.
- Eccentric Locking Collar: Rotate the collar to ensure it moves freely and locks as designed.
5. Lubrication Verification:
- Grease Nipple (Zerk Fitting): Ensure it is present and securely threaded.
- Initial Grease: Some bearings come pre-greased. Check that a small amount of fresh grease is visible around the seals (not excessive, just a trace). For relubricatable types, a small shot of grease from the fitting should reach the bearing.
My Insight from the Factory Floor:
In our production line, we have dedicated inspection stations. Every pillow block does not get a full dimensional check (that would be too slow), but we use a statistical sampling plan. For every batch, we pull several units and perform the full protocol. We also do a 100% rotational check on all inserts—a trained inspector spins each one by hand to feel for any roughness. This simple human touch catches problems that machines sometimes miss. For our B2B clients, we provide an inspection certificate with every shipment. This document is their assurance that the checks were done. When a client like Rajesh receives his container, he knows he can trust the products inside because we’ve already done the work. This builds confidence and reduces his need to re-inspect every piece.
How to visually inspect a bearing?
You have a bearing in your hand. You want to know if it’s good quality before installing it. A detailed lab test isn’t possible. Your eyes and basic tools are all you have. Visual inspection is a powerful, underrated skill.
To visually inspect a bearing, examine the raceways1 and rolling elements2 for any signs of rust, pitting, or discoloration. Check the cage3 for damage, deformation, or loose rivets. Inspect the seals or shields4 for damage, gaps, or improper seating. Look at the outer surfaces5 for handling damage, nicks, or grinding marks. A smooth, clean, uniform appearance is the goal.
Your eyes can catch 90% of common defects. You just need to know what to look for.
A Visual Inspection Checklist for Bearings
1. Preparation:
- Clean Hands and Workspace: Oils and dirt from your hands can obscure defects. Wear clean gloves.
- Good Lighting: Use a bright, directed light source. An LED inspection light or even a phone flashlight is helpful.
- Magnification: A simple jeweler’s loupe or magnifying glass helps spot fine details.
2. What to Look For: A Component-by-Component Guide
| Component | What to Inspect | Good Appearance | Bad Appearance (Reject) |
|---|---|---|---|
| Raceways (Inner & Outer Ring) | Surface finish, color, uniformity. | Smooth, mirror-like polished surface. Consistent color (silver/light gray). | Rust (red/orange spots), pitting (small craters), scratches (linear marks), discoloration (blue/brown from overheating), brinelling (dents spaced at ball/roller pitch). |
| Rolling Elements (Balls/Rollers) | Surface finish, uniformity. | Smooth, polished, all identical in size and luster. | Rust, pitting, scratches, flat spots, discoloration. |
| Cage (Retainer) | Structural integrity, rivets, pockets. | Clean, undamaged, all rivets present and tight. Rollers/balls move freely in pockets. | Cracks, bent or broken sections, missing rivets, signs of wear (polishing) from contact with rollers. |
| Seals/Shields | Fit, condition, centering. | Perfectly round, seated flush in outer ring groove, no gaps between seal and inner ring. | Torn rubber, deformed metal shield, seal lip folded or not contacting inner ring, rust on shield. |
| Outer Surfaces (Rings) | Finish, markings. | Smooth machined finish. Clear, sharp brand and size markings. | Nicks, burrs, rust spots, grinding marks, blurry or missing markings. |
3. Special Checks for Pillow Block Inserts6:
When inspecting a bearing insert (the part inside the pillow block housing), add these checks:
- Locking Mechanism: Look at the set screws or eccentric collar. Are they clean and undamaged? Is the thread good?
- Spherical OD: The outside diameter of the insert (which sits in the housing) should be smooth and free of scratches.
4. The "Rotate and Feel" Test:
This is not purely visual, but it’s a critical sensory check done at the same time.
- Hold the inner ring and spin the outer ring (or vice versa). It should rotate smoothly with no "catch" or rough spot.
- Listen carefully. Any grinding, clicking, or uneven sound indicates a defect.
My Insight on the Value of Visual Inspection:
In our factory, we train every operator to visually inspect the bearings they produce before they pass them to the next station. The final inspection team does a 100% visual check on a sample. But the real power of visual inspection7 is in the field. For a distributor like Rajesh, being able to quickly visually inspect a bearing upon receipt can prevent a bad batch from reaching his customers. I advise all our clients: when you open a box, spend 30 seconds looking at the bearings. If something looks off—rust, rough finish, damaged seals—don’t install it. Contact your supplier immediately. A quick visual check is cheap insurance against a costly machine failure.
What are the common problems with pillow blocks?
Your customer calls. The new pillow block they installed is noisy and hot. They blame the product. But the root cause might be a common problem that occurs during manufacturing, handling, or installation. Knowing these problems helps you prevent them.
Common problems with pillow blocks include housing casting defects (cracks, porosity), bearing insert defects1 (rough rotation, excessive play, seal damage), locking mechanism failure (set screws loose or damaged), incorrect internal clearance2, contamination from poor sealing, and misalignment3 during installation. These issues lead to noise, heat, and premature failure.

Let’s categorize these problems by their source so you can identify and address them effectively.
A Problem-Source-Action Matrix for Pillow Blocks
1. Manufacturing-Related Problems (Originating at the Factory):
These are defects in the product itself. Our inspection process is designed to catch them.
| Problem | Visual Sign | How We Catch It | Action |
|---|---|---|---|
| Housing Porosity/Cracks | Small holes or visible cracks in cast iron housing. | Visual inspection. Dimensional check may show bore out of round. | Reject housing before assembly. |
| Insert Rough Rotation | Grinding or catching feeling when spinning insert by hand. | 100% rotational check on inserts. | Remove and replace defective insert. |
| Seal Damage | Torn, deformed, or improperly seated seal. | Visual inspection of seals before shipment. | Replace seal or entire insert. |
| Incorrect Clearance | Excessive radial or axial play, or no play at all. | Sample dimensional checks. Feel test during rotation. | Reject batch; verify clearance spec. |
| Locking Mechanism Issue | Set screws not threaded properly; collar doesn’t lock. | Functional check on sample. | Repair or replace housing/insert. |
2. Handling and Logistics-Related Problems:
These occur during packaging, shipping, or storage.
| Problem | Visual Sign | Prevention | Action Upon Receipt |
|---|---|---|---|
| Rust on Housing/Insert | Orange/red discoloration on machined surfaces. | Proper rust-proofing before shipment. Good packaging with VCI (Volatile Corrosion Inhibitor) paper. | Clean light rust. For heavy rust, file a claim. The bearing may be compromised. |
| Physical Damage | Dents, bent flanges, cracked housings. | Robust packaging (wooden crates for heavy items, sturdy cartons for smaller). | Document with photos. File a claim with freight company and supplier. |
| Contamination | Dirt or debris inside the bearing or housing. | Sealed packaging. Clean assembly environment. | Do not install. Contamination will destroy the bearing. Return/replace. |
3. Installation-Related Problems:
These happen at the customer’s site. They are not the product’s fault, but they are the most common cause of complaints.
| Problem | Symptom | Cause | Solution (Training) |
|---|---|---|---|
| Misalignment | Noise, heat, uneven wear. | Pillow blocks not aligned on the same centerline. | Use a straightedge or laser to align bases before tightening bolts. |
| Overtightening Set Screws | Distorted inner ring, rough rotation. | Using excessive force on hex key. | Follow torque recommendations. Tighten evenly. |
| Undertightening Set Screws | Bearing slips on shaft, causing fretting wear. | Not tightening enough. | Ensure screws are snug against the shaft dimples. |
| Soft Foot | Housing rocks when bolted down; vibration. | Base not flat on mounting surface. | Use feeler gauges to check gap; shim if necessary. |
| Over-lubrication | Overheating, grease leaking from seals. | Adding too much grease at installation. | Fill housing cavity only 30-50% full. |
| Under-lubrication | Noise, overheating, rapid wear. | Not greasing or using wrong grease. | Follow lubrication schedule and type. |
My Insight on Preventing Problems:
For a distributor like Rajesh, the most expensive problems are the ones that happen after he sells the product. A customer blames him for a failure, even if it was caused by poor installation. We help him by providing simple installation guides and troubleshooting checklists that he can give to his customers. When a customer calls with a problem, Rajesh can ask: "Did you check alignment? How much grease did you use?" Often, the answer reveals the true cause. This proactive approach turns a potential complaint into a coaching moment, strengthening the customer relationship. The best way to deal with common problems is to educate the end-user so they never happen in the first place.
How to check the quality of a bearing?
You have bearings from different sources. Some are cheap, some are expensive. You need a way to verify quality before you commit to a large order. Price alone is not a reliable indicator. You need objective tests.
To check the quality of a bearing, perform a combination of visual inspection1, dimensional checks2 (using micrometers and calipers), rotational smoothness testing3 (by hand and with a spin tester for noise), clearance measurement (using feeler gauges or a dial indicator), and material verification4 (checking hardness or requesting material certificates from the manufacturer).
Quality is not a single attribute. It is a collection of characteristics that must all be present.
A Multi-Faceted Approach to Bearing Quality Assessment
1. The Manufacturer’s Credentials (Paper Quality):
Before you even touch a bearing, check the paperwork.
- ISO Certification5: Does the manufacturer have ISO 9001 certification? This indicates a quality management system is in place.
- Material Certificates: Can they provide mill certificates for the steel used? This verifies the raw material meets specifications.
- Test Reports: Do they offer inspection reports for the batch, showing actual measured values for key dimensions?
2. Dimensional Accuracy:
This is objective and measurable. Use calibrated tools.
- Bore Diameter (d): Measure at several points with an internal micrometer. Must be within the tolerance class (e.g., P0, P6).
- Outside Diameter (D): Measure with an external micrometer.
- Width (B): Measure with calipers.
- Radial Runout: Mount the bearing on a precision mandrel and use a dial indicator to measure the runout of the outer ring as it rotates. This indicates geometric precision.
- Comparison Table: Compare your measured values to the ISO tolerance tables for the claimed precision class. If a bearing is sold as "P6" but measures like "P0," it’s a quality issue.
3. Internal Clearance (Radial Play):
This is a critical performance parameter.
- Method: Use a feeler gauge between a roller and raceway (for larger bearings) or a dedicated clearance measurement tool. For ball bearings, the axial play method (as described in a previous article) is common.
- Verify Marking: If the bearing is marked "C3," measure the clearance to ensure it falls within the C3 range, not CN or C4.
4. Rotational Quality (Noise and Vibration):
- Hand Spin Test: As described earlier. A quality bearing spins smoothly and quietly. Any roughness is a red flag.
- Sound Test (Anderometer): For a more scientific test, manufacturers use an "anderometer" or bearing vibration tester. This machine spins the bearing under a light load and measures vibration in three frequency bands. The results are graded (e.g., Z1, Z2, Z3 for lower noise). Ask your supplier if they have this data.
5. Seal and Cage Quality:
- Seal Inspection: As per visual inspection1. Also, check if the seals are made from good quality, flexible rubber (Nitrile, Viton) and are properly bonded to the metal insert.
- Cage Material and Construction: Is the cage pressed steel, machined brass, or polyamide? Is it well-made with no sharp edges? For polyamide, ensure it’s glass-fiber reinforced (usually black in color).
6. The "Destructive" Test (For Sampling):
For a truly critical application, you might sacrifice a sample bearing to check:
- Hardness Testing: Use a Rockwell or Vickers hardness tester on a sectioned ring. It should be 58-65 HRC.
- Case Depth (for case-hardened bearings): Microscopic examination.
- Material Analysis: Spectrographic analysis to confirm steel grade.
My Insight on Balancing Cost and Quality:
At FYTZ, we position ourselves as a quality manufacturer, not the cheapest. We know our bearings are inspected at multiple stages. We encourage serious buyers to visit our factory or request samples for testing. For a distributor like Rajesh, the decision often comes down to trust. He might start with a small order, perform his own inspections (using the methods above), and then scale up based on the results. The best indicator of quality over time is consistency. A manufacturer who delivers the same good quality batch after batch earns the right to be a long-term partner. Checking quality is not a one-time event. It’s an ongoing relationship built on verified performance.
Conclusion
Thorough inspection of pillow block bearings—housings and inserts—before shipment prevents costly field failures. By combining visual checks, dimensional verification, and rotational testing, you ensure only reliable products reach your customers, protecting your reputation and theirs.
Tags: Pillow Block Bearing Inspection, How to Check Bearing Quality, Bearing Visual Inspection Guide, Common Bearing Problems, Bearing Quality Control
-
Understanding visual inspection can help you identify potential issues before deeper testing. ↩ ↩ ↩ ↩ ↩
-
Learn the best practices for dimensional checks to ensure your bearings meet specifications. ↩ ↩ ↩ ↩
-
Discover how rotational smoothness testing can reveal the quality of bearings effectively. ↩ ↩ ↩ ↩
-
Explore material verification techniques to ensure the raw materials meet quality standards. ↩ ↩ ↩
-
ISO Certification indicates a commitment to quality management, essential for reliable bearings. ↩ ↩
-
Pillow block inserts require special attention; learn the key inspection criteria. ↩
-
Visual inspection is a cost-effective way to ensure bearing quality; understand its value. ↩